


Nut Mylk
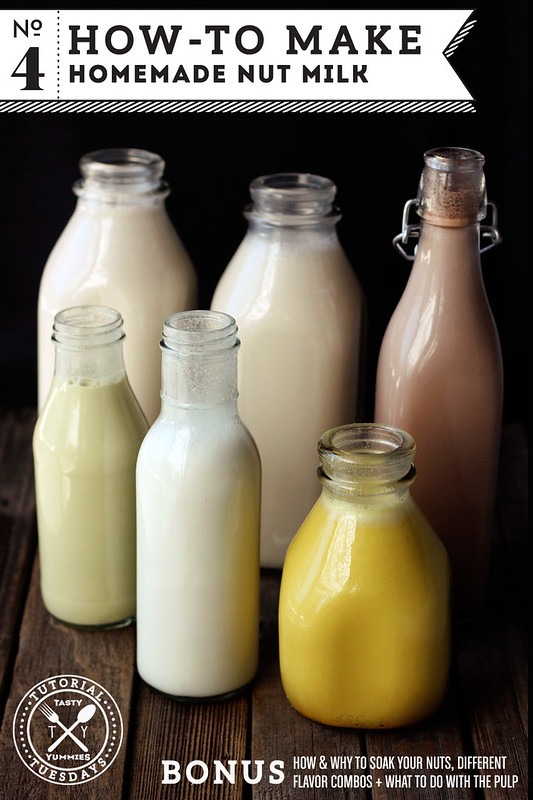
How-to Make Nut Milk
I am super excited to share this tutorial with you guys! Many of you have asked for a tutorial on nut milks, since I started the Tutorial Tuesdays Series. I have been making my own nut milks for quite a few years now. Once I realized just how simple it was, I have made a quart of almond milk nearly every single week.
I also love making variations on the flavors, at least once a month I make a quart of raw cacao almond nut milk. It’s the perfect sweet treat for me.
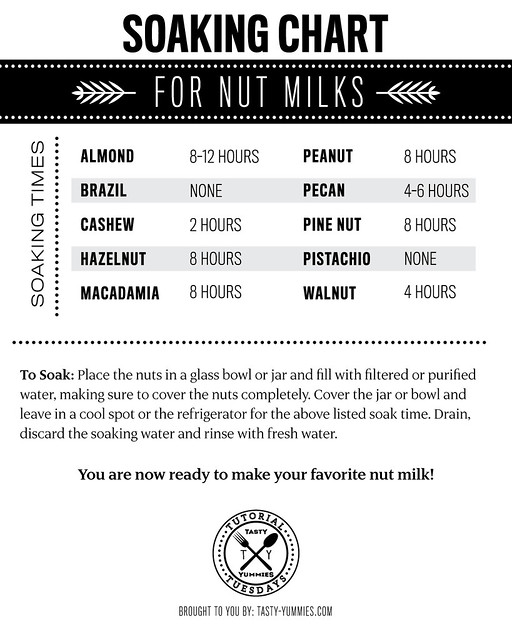
Much like my nut butter post, this is a general overview on how to make nut milks, but really the sky is the limit. If you have a favorite nut – I say MILK IT! As with the nut butters, I recommend soaking your nuts first, but for nut milks dehydration isn’t necessary, so it’s that much easier. Below you will find a chart on soaking times for various milks.
What Nuts Can You Milk?
First of all, let’s just get all the giggles out now. Sooo many amazing innuendos when it comes to nut milks. Oh, and guess what? It doesn’t get old. Everytime I pull my nut bag out. A good laugh is had! Anyhow - I myself have made nut milks from almonds, cashews, hazelnuts, macadamia nuts and pistachios, but from what I understand the same rules apply no matter what nut you choose, so you can create nut milks from any of the other nuts listed below and likely many others, too. FYI macadamia nut milk is amazing, so rich and full of incredible flavor, but literally it may be the most expensive nut milk you can make. I made a batch for this testing and I kinda wish I hadn’t. It was so good.
How & Why to Soak Your Nuts
Why I Choose to Soak: Most nuts, seeds, grains and beans are covered in natural chemicals – enzyme inhibitors and toxins – that protect them while growing, both from sprouting prematurely and also from predators. These nutritional inhibitors and toxic substances are enzyme inhibitors, phytates (phytic acid), polyphenols (tannins), and goitrogens. Once harvested, those same chemicals, the major one being phytic acid – are indigestible to the human body and must be broken down before consumption. When food containing phytic acid is consumed, the acid combines with important minerals like calcium, magnesium, copper, iron and especially zinc in the intestinal tract and blocks their absorption which inhibits our digestive systems’ ability to break the nut down properly.
The very simple process of soaking releases these chemicals, helping you to absorb your food’s essential minerals and nutrients. Additionally, by soaking the nuts with the removal of these nutritional inhibitors and toxic substances, the flavor and taste is much more ideal and appealing.
To summarize: Soaking nuts makes them easier to digest and improves their flavor.
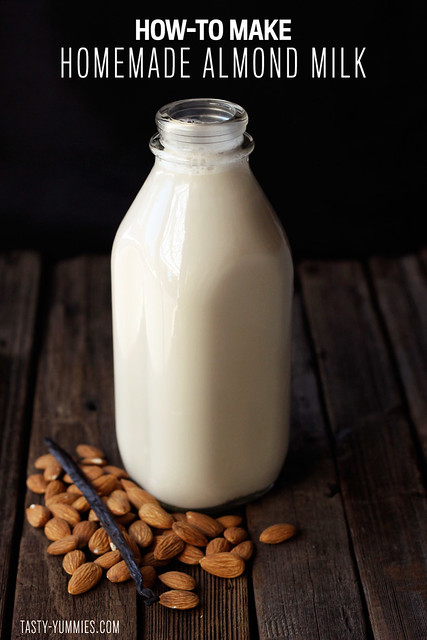
How-to Make Homemade Nut Milks
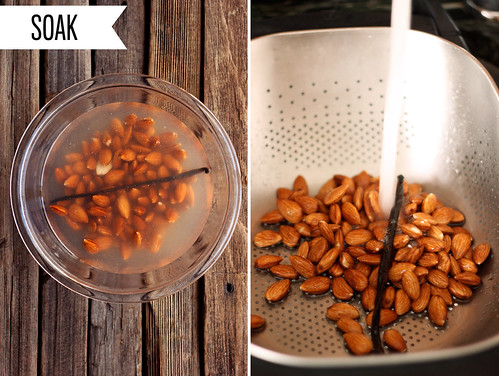
1) Soak your nuts in filtered water for the appropriate time, drain and rinse.

2) Blend your soaked nuts with filtered water, adding in any flavorings you would like.
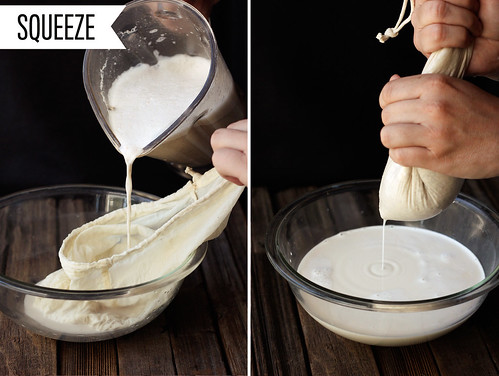
3) Pour into your nut milk bag and squeeze. Separating the pulp from the milk.
makes 1 quart
- 1-2 cups raw unsalted organic nuts*
- 4 cups filtered or purified water
Optional:
- pinch of himalayan sea salt (optional)
- 1-2 tablespoon local raw honey or other sweetener (optional)
- 1 vanilla bean or 1 teaspoon vanilla extract (optional)
1) Soak your nuts and vanilla bean (if you are using one) for at the appropriate amount of time (see above chart for appropriate soaking times)
2) Discard soaking water and rinse your nuts and the vanilla bean.
3) Place soaked nuts, the whole soaked vanilla bean (you can chop it up or split it open if you wish) or vanilla extract, honey (or other sweetener), a dash of sea salt and 4 cups of water in a blender. Cover and blend on high for 1-2 minutes. It will be milky and have a bit of foam on the top.
4) Strain milk through a nut bag and squeeze into a bowl. (see my suggestions below on what I use)
SERVE.
* I find that 1 cup of nuts is more than enough for 1 quart of milk, some people prefer 2 cups.
NOTES:
These same instructions work for any nut that you prefer to use. Though, generally almonds are my go-to choice.
Store in a covered glass jar, bottle or pitcher in the refrigerator, it’ll be good for about 4-5 days.
Separation is totally natural with homemade nut milks, just be sure to shake it up just before serving.
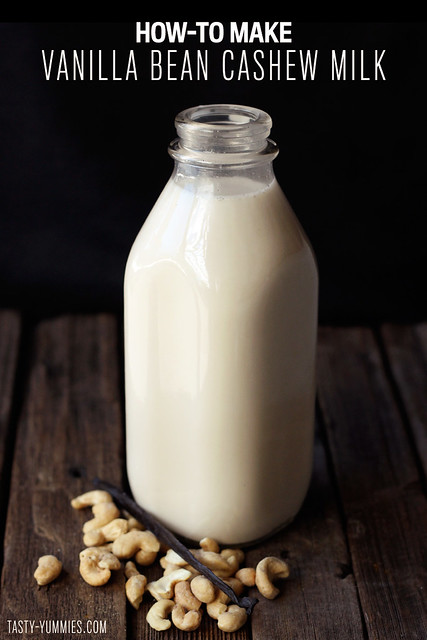
This rich and creamy flavorful milk is amazing in smoothies and over your favorite cereal.
makes 1 quart
- 1 cup raw unsalted organic cashews
- 4 cups filtered or purified water
- pinch of himalayan sea salt
- 1 tablespoon local raw honey or other sweetener
- 1 vanilla bean
1) Soak your raw cashews and vanilla bean in filtered water for at least 2 hours.
2) Discard soaking water and rinse your cashews and the vanilla bean.
3) Place soaked cashews, honey (or other sweetener), vanilla bean, a dash of sea salt and 4 cups of water in a blender. Cover and blend on high for 1-2 minutes. It will be milky and have a bit of foam on the top.
4) Strain milk through a nut bag, doubled up cheesecloth or a fine mesh strainer. (see my suggestions below on what I use)
Notes: Some people prefer not to strain their cashew milk, since it technically doesn’t have to be, (think about all those glorious creamy cashew cream sauces). Even though it has far less pulp than other nuts, I don’t have a Vitamix (yet) so I personally don’t love the grittiness that mine still had.
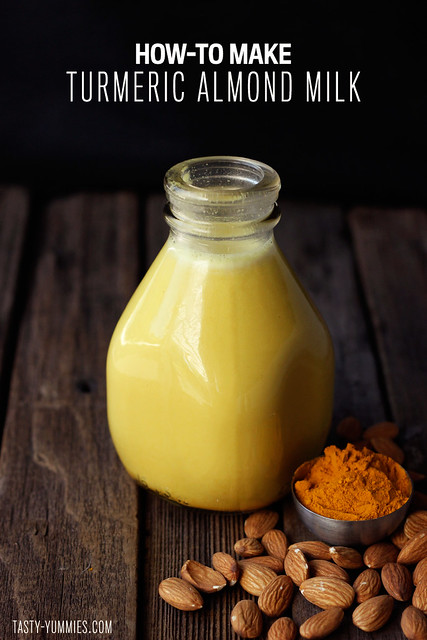
Inspired by my incredibly creative and talented friends, Nicola and Yael, at Almond Milk LA. Reap all of the wonderful anti-inflammatory benefits of both the raw almonds and the turmeric. This drink is great served chilled and even better warmed up and served as a hot, comforting beverage to cure all that ails.
makes 1 quart
- 1 cup organic raw unsalted almonds
- 4 cups filtered or purified water
- pinch of himalayan sea salt (optional)
- 1 tablespoon local raw honey or other sweetener (optional)
- 1-2 tablespoons turmeric powder (I find turmeric to have a mild flavor, so I go with 2 tablespoons)
1) Soak your almonds in filtered water for 8-12 hours.
2) Discard soaking water and rinse your almonds.
3) Place soaked almonds, honey (or other sweetener), turmeric powder, a dash of sea salt and 4 cups of water in a blender. Cover and blend on high for 1-2 minutes. It will be milky and have a bit of foam on the top.
4) Strain milk through a nut bag, doubled up cheesecloth or a fine mesh strainer. (see my suggestions below on what I use)
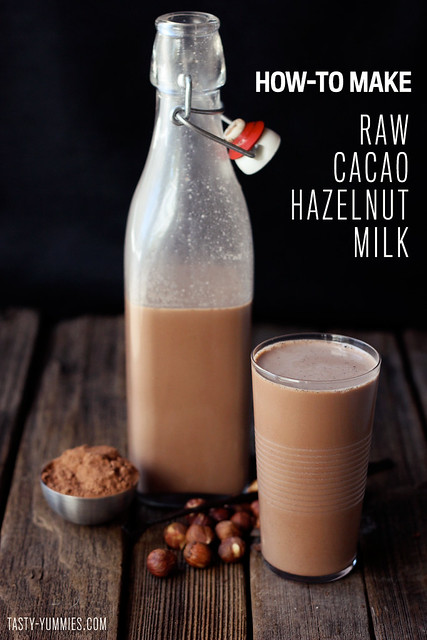
This nut milk is LIFE CHANGING! It literally tastes like Nutella, but in drink form :SWOON: I love it as a sweet way to finish my day, instead of a dessert.
makes 1 quart
- 1 cup raw unsalted organic hazelnuts
- 4 cups filtered or purified water
- pinch of himalayan sea salt
- 2 tablespoons local raw honey or other sweetener
- 1 vanilla bean
- 2 tablespoons raw cacao powder
1) Soak your raw hazelnuts and vanilla bean in filtered water for 8 hours.
2) Discard soaking water and rinse your hazelnuts and the vanilla bean.
3) Place soaked hazelnuts, honey (or other sweetener), vanilla bean, raw cacao powder, a dash of sea salt and 4 cups of water in a blender. Cover and blend on high for 1-2 minutes. It will be milky and have a bit of foam on the top.
4) Strain milk through a nut bag, doubled up cheesecloth or a fine mesh strainer. (see my suggestions below on what I use)
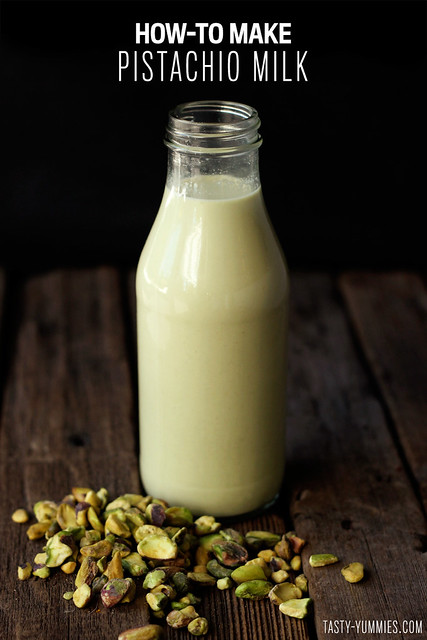
Pistachio milk has a very strong and distinct, nutty flavor. If you love pistachios, this one is definitely for you. Plus, that subtle green hue is just so beautiful. I am not sure if it’s because of their complimentary hues or if they truly are a great match – but I love adding a little ground cardamom to my pistachio milk. Pistachio milk and it’s strong taste to me, isn’t exactly my favorite nut milk for straight drinking, but it makes a wonderful addition to smoothies and creamy sweet dessert recipes.
makes 1 quart
- 1 cup raw unsalted organic pistachios
- 4 cups filtered or purified water
- pinch of himalayan sea salt
- 1 tablespoon coconut sugary or other sweetener
- 1 vanilla bean or 1 teaspoon vanilla extract (optional)
NOTE: Pistachios do not need to be soaked – so you can go to town and make your pistachio milk, whenever you’d like.
1) Place the pistachios, coconut sugar (or other sweetener), vanilla bean (or vanilla extract), a dash of sea salt and 4 cups of water in a blender. Cover and blend on high for 1-2 minutes. It will be milky and have a bit of foam on the top.
2) Strain milk through a nut bag, doubled up cheesecloth or a fine mesh strainer. (see my suggestions below on what I use)
Optional Add-ins for Your Nut Milks
For every batch of nut milk I make, I always add a pinch of pink Himalyan sea salt and about 1-2 tablespoons of local raw honey (unless I need unsweetened nut milk for a savory dish some reason). Besides that there are so many variations and fun things you can add to your nut milks.
SWEETENERS: Besides raw local honey which is my favorite, other options for natural sweeteners include: medjool dates, maple syrup, coconut nectar, raw sugar, stevia, xylitol and so on.
FLAVORS: For flavorings there are so many lovely possibilities. Some of my favorites are vanilla bean, vanilla extract, raw cacao, lavender (which is just incredible), turmeric, spices such as cinnamon, nutmeg, cardamom, etc. There are so many amazing possibilities.
OTHER: You can also add things like hemp seeds for additional some Omega-3 and Omega-6 and protein, coconut water instead of regular water for a fun flavor twist, you can add oats, flaxseeds and so on. Have fun with it.
What To Do With Your Nut Milks
You can use nut milks just as you would regular milk in any recipes, including baked goods. Remember if you are using homemade nut milk in a savory recipe, leave out the sweetener and additional flavorings, such as vanilla. I love enjoying my homemade nut milks cold straight from the fridge in a tall glass, they are the best in homemade smoothies, nut milks are also great served hot in homemade hot cocoa, a mocha, coffee or tea lattes and so one. Add it to a shaker with your favorite spirits and you can make amazing cocktails. The list goes on and on. How do you enjoy your nut milks?
What To Do With the Leftover Pulp
There are so many different uses for the leftover pulp you can add it to smoothies or your morning oatmeal, you can add it to dips, homemade granolas, to the batter of your cookies or muffin, crackers, or you can even dehydrate it and then blend it up to make almond meal. When all else fails freeze it for later or compost it if you really don’t have room for it.
Here are some great recipes for things you can do with the leftover pulp:
Raw Chocolate Chip Cookie Dough Bars Tasty Yummies
Chipotle Almond Dip Tasty Yummies
Almond Pulp Body Scrub The Blender Girl
Vanilla Almond Sugar Cookies Tasty Yummies
Almond Pulp Crackers Elana’s Pantry
Almond Pulp Brownies The Bojon Gourmet
Almond Cookie Balls Laura’s Sweet Spot
Nut-free Non-Dairy Milk Recipes
Can’t have nuts? Here are a few nut-free non-dairy milk recipes for you:
How-to Make Coconut Milk from Shredded Coconut So Let’s Hang Out for The Kitchn
Brown Rice Milk Happy Yolks
Vanilla Hempseed Milk Healthful Pursuit
Oat Milk Happy Food Healthy Life
Coconut Milk from Fresh Whole Coconuts Nourished Kitchen
Sunflower Seed Milk Healthful Pursuit
Coconut Oat Milk Running to the Kitchen
Rice Milk Horchata Tasty Yummies
Pumpkin Spiced Pepita Milk Beard and Bonnet
Flax Milk Healthful Pursuit
Nut Milk Bags
I was using this nut bag for quite a while, but I didn’t love that it wasn’t made from organic materials.
I recently bought this organic cotton nut milk bag from Cultures for Health and I absolutely love it. I feel so much better using it knowing that it is fully organic and the quality is incredible.
The great thing about most nut milk bags is that you can also use them for sprouting nuts, seeds and grains.
** I personally do not recommend using the cheesecloth, strainer or pantyhose methods, they are messy and require multiple passes to strain all the bits out. It is never quite as creamy as when I use a good nut milk bag.
For those curious, this is the blender that I use. It works great! Someday I will splurge and get a Blentec or Vitamix, until then – this works just perfectly!
courtesy of: http://tasty-yummies.com/2014/04/08/how-to-make-nut-milk/
 Vanessa Barg
Reader Comments